You've got insulation up there. So why does your loft still feel like a freezer in winter?
It's a common frustration for UK homeowners. You assume the job was done right years ago. Yet the cold air keeps creeping in. Your energy bills stay high. And that upstairs bedroom never quite warms up.
The truth is, a cold loft usually points to fixable problems. Let's walk through the ten most common reasons: and what you can do about each one.
1. Your Insulation Doesn't Meet Current Standards
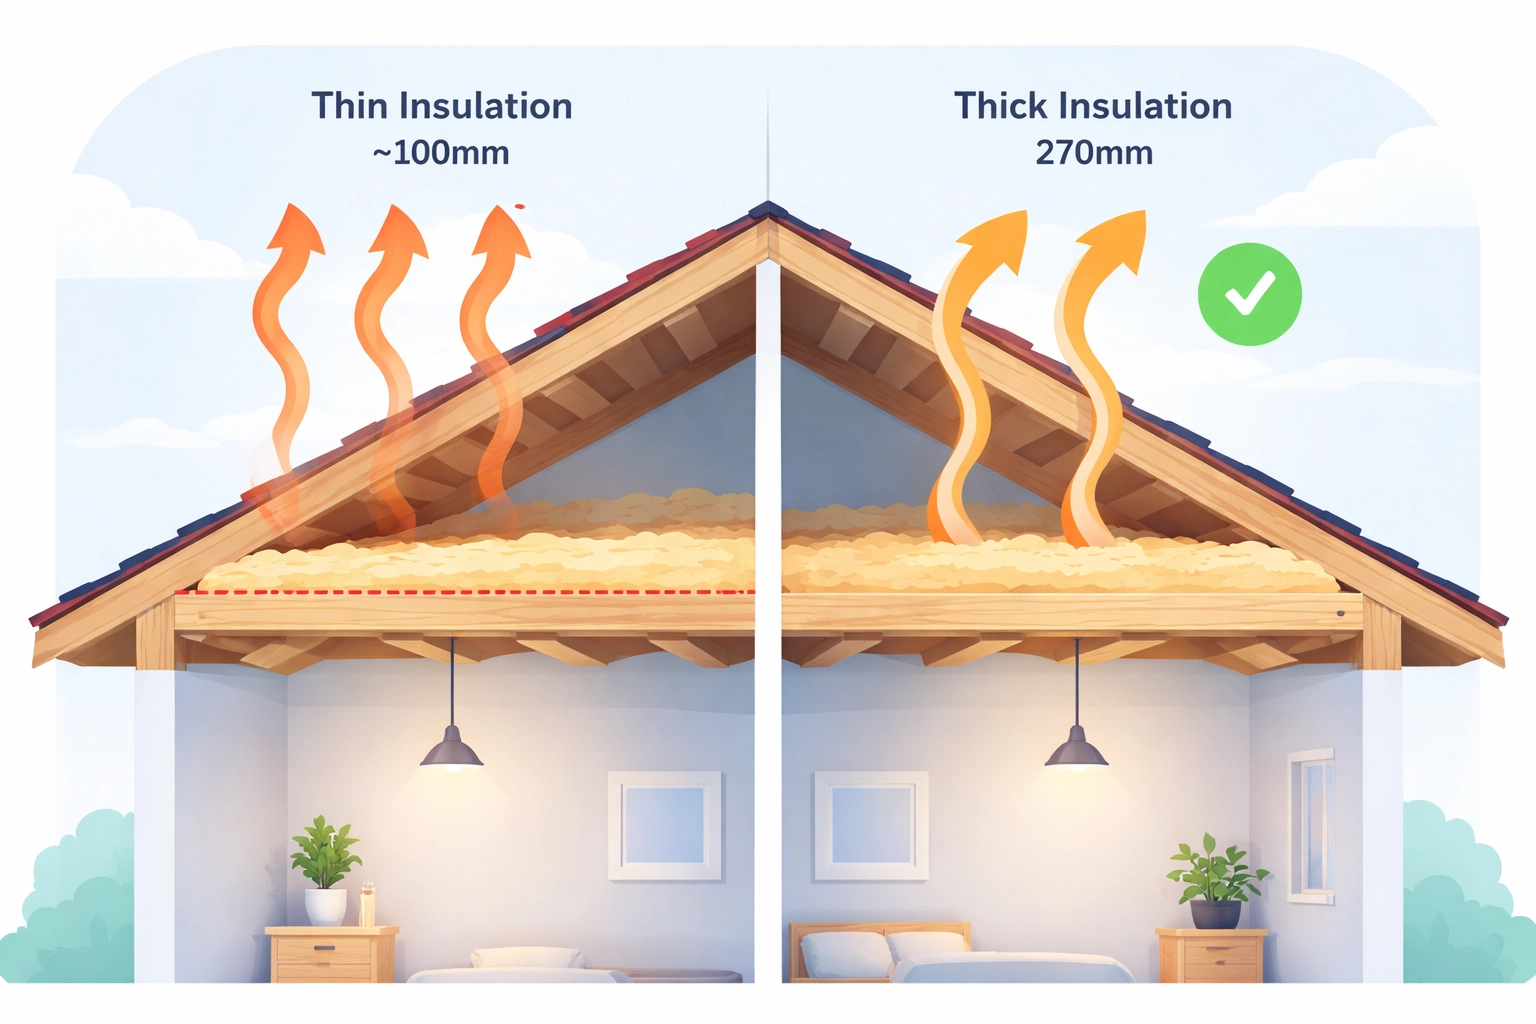
Building regulations have changed significantly over the years. If your loft insulation was installed before 2010, it likely doesn't meet the 270mm depth now recommended under Part L regulations.
Older homes often have just 100mm or less. That's nowhere near enough to stop heat loss through the roof effectively.
The fix: Top up your existing insulation to reach 270mm. This is one of the simplest and most cost-effective energy saving upgrades for lofts.
2. Gaps and Missing Coverage
Insulation only works when it forms a continuous thermal barrier. Even small gaps around pipes, cables, or hatches create cold spots.
These gaps act like open windows. Warm air escapes. Cold air rushes in.
The fix: A professional loft survey identifies every gap. Our certified teams then ensure complete, even coverage across your entire loft floor.
3. Compressed or Settled Insulation
Insulation loses effectiveness when it's squashed. Walking on it, storing boxes directly on top, or simple age causes compression.
Compressed mineral wool or fibreglass can lose up to 50% of its insulating value. It looks fine from above but performs poorly.
The fix: Replace compressed sections with fresh material. Consider loft legs to create a raised storage platform that protects your insulation underneath.
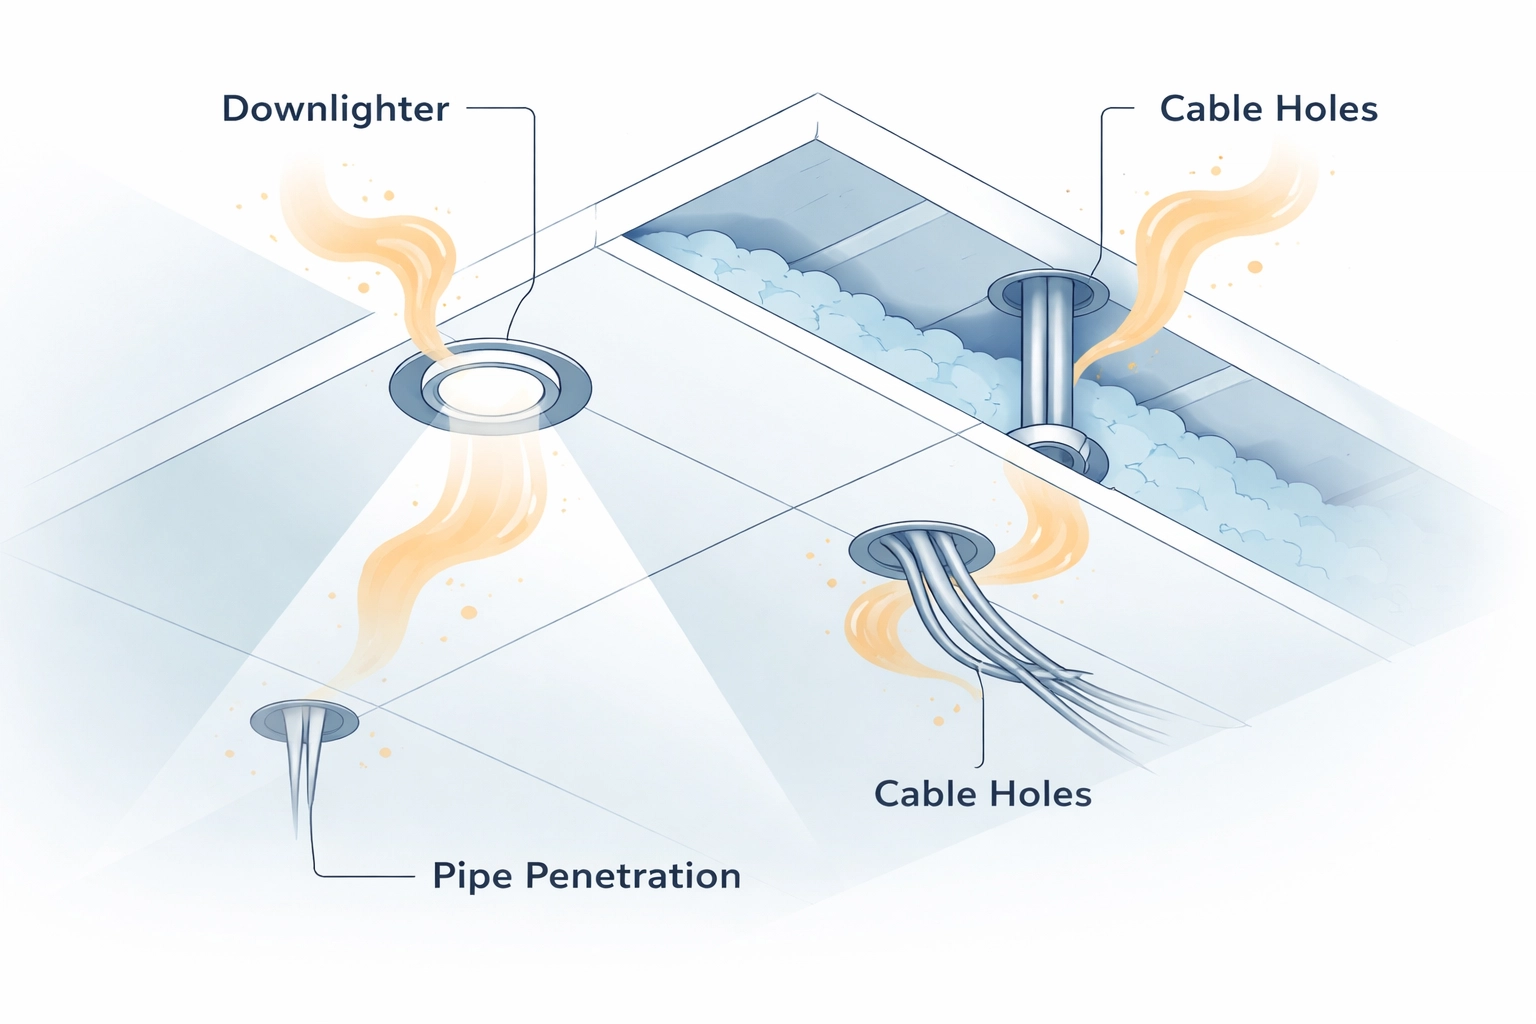
4. Unsealed Air Leaks
Here's the overlooked problem. Air leakage accounts for a huge portion of heat loss: sometimes more than poor insulation itself.
Common leak points include:
- Around downlighters and ceiling roses
- Gaps where pipes and cables penetrate the ceiling
- The loft hatch frame
- Around chimneys and flues
The fix: Air sealing must happen before adding insulation. Our teams seal all penetrations with appropriate materials, then insulate on top.
5. Condensation and Moisture Problems
A cold loft often has a damp loft too. When warm, moist air from your home meets cold surfaces in the loft, condensation forms.
This moisture soaks into insulation. Wet insulation is essentially useless. It also encourages mould growth and can damage timber rafters over time.
The fix: Proper loft condensation solutions involve improving ventilation, sealing air leaks from below, and sometimes installing a vapour barrier. Our surveys identify the root cause before recommending action.
6. Poor or Blocked Ventilation
Your loft needs airflow. Without it, moisture builds up and temperatures become extreme: freezing in winter, boiling in summer.
Blocked soffit vents, missing tile vents, or poorly positioned insulation can all restrict airflow.
The fix: Ensure soffit vents remain clear. Keep insulation away from the eaves using vent trays. In some cases, additional roof vents may be needed.
7. The Loft Hatch Isn't Insulated
Most people forget this one. Your loft hatch is essentially a hole in your ceiling.
An uninsulated, poorly sealed hatch lets warm air pour into the loft space. You feel the draught every time you walk past it.
The fix: Fit an insulated hatch cover and draught-proof strips around the frame. It's a small job with noticeable results.

8. Wrong Insulation Type for Your Loft
Not all insulation suits every situation. A cold loft with limited headroom needs a different approach than a spacious, well-ventilated one.
Traditional mineral wool works well for standard lofts. But if you need to preserve space: perhaps for storage or a future conversion: multifoil insulation offers excellent thermal performance at a fraction of the thickness.
The fix: Match the insulation type to your loft's specific conditions. A professional assessment ensures you choose correctly.
9. Previous DIY Installation Errors
DIY loft insulation often looks adequate but underperforms. Common mistakes include:
- Leaving gaps around obstacles
- Compressing rolls to fit awkward spaces
- Blocking ventilation at the eaves
- Ignoring air sealing entirely
These errors create thermal bridges: paths for heat to escape.
The fix: Professional loft insulation installers know the Building Regulations requirements. They install to specification, ensuring your insulation actually delivers the energy savings promised.
10. Spray Foam Causing Problems
Some homeowners have spray foam insulation that's now causing issues. While spray foam can work in certain applications, poorly installed spray foam creates more problems than it solves.
It can trap moisture, mask timber defects, and even cause mortgage complications when you try to sell.
The fix: Spray foam removal followed by proper insulation restores your loft to a healthy, mortgage-friendly state.
How to Diagnose Your Cold Loft
Before booking any work, try these simple checks:
- Measure your insulation depth. Anything under 270mm needs topping up.
- Look for gaps. Check around pipes, cables, hatches, and at the eaves.
- Check for dampness. Feel the insulation. Look for dark patches on timbers.
- Inspect ventilation. Can you see daylight through soffit vents?
- Feel for draughts. Hold your hand near the loft hatch on a windy day.
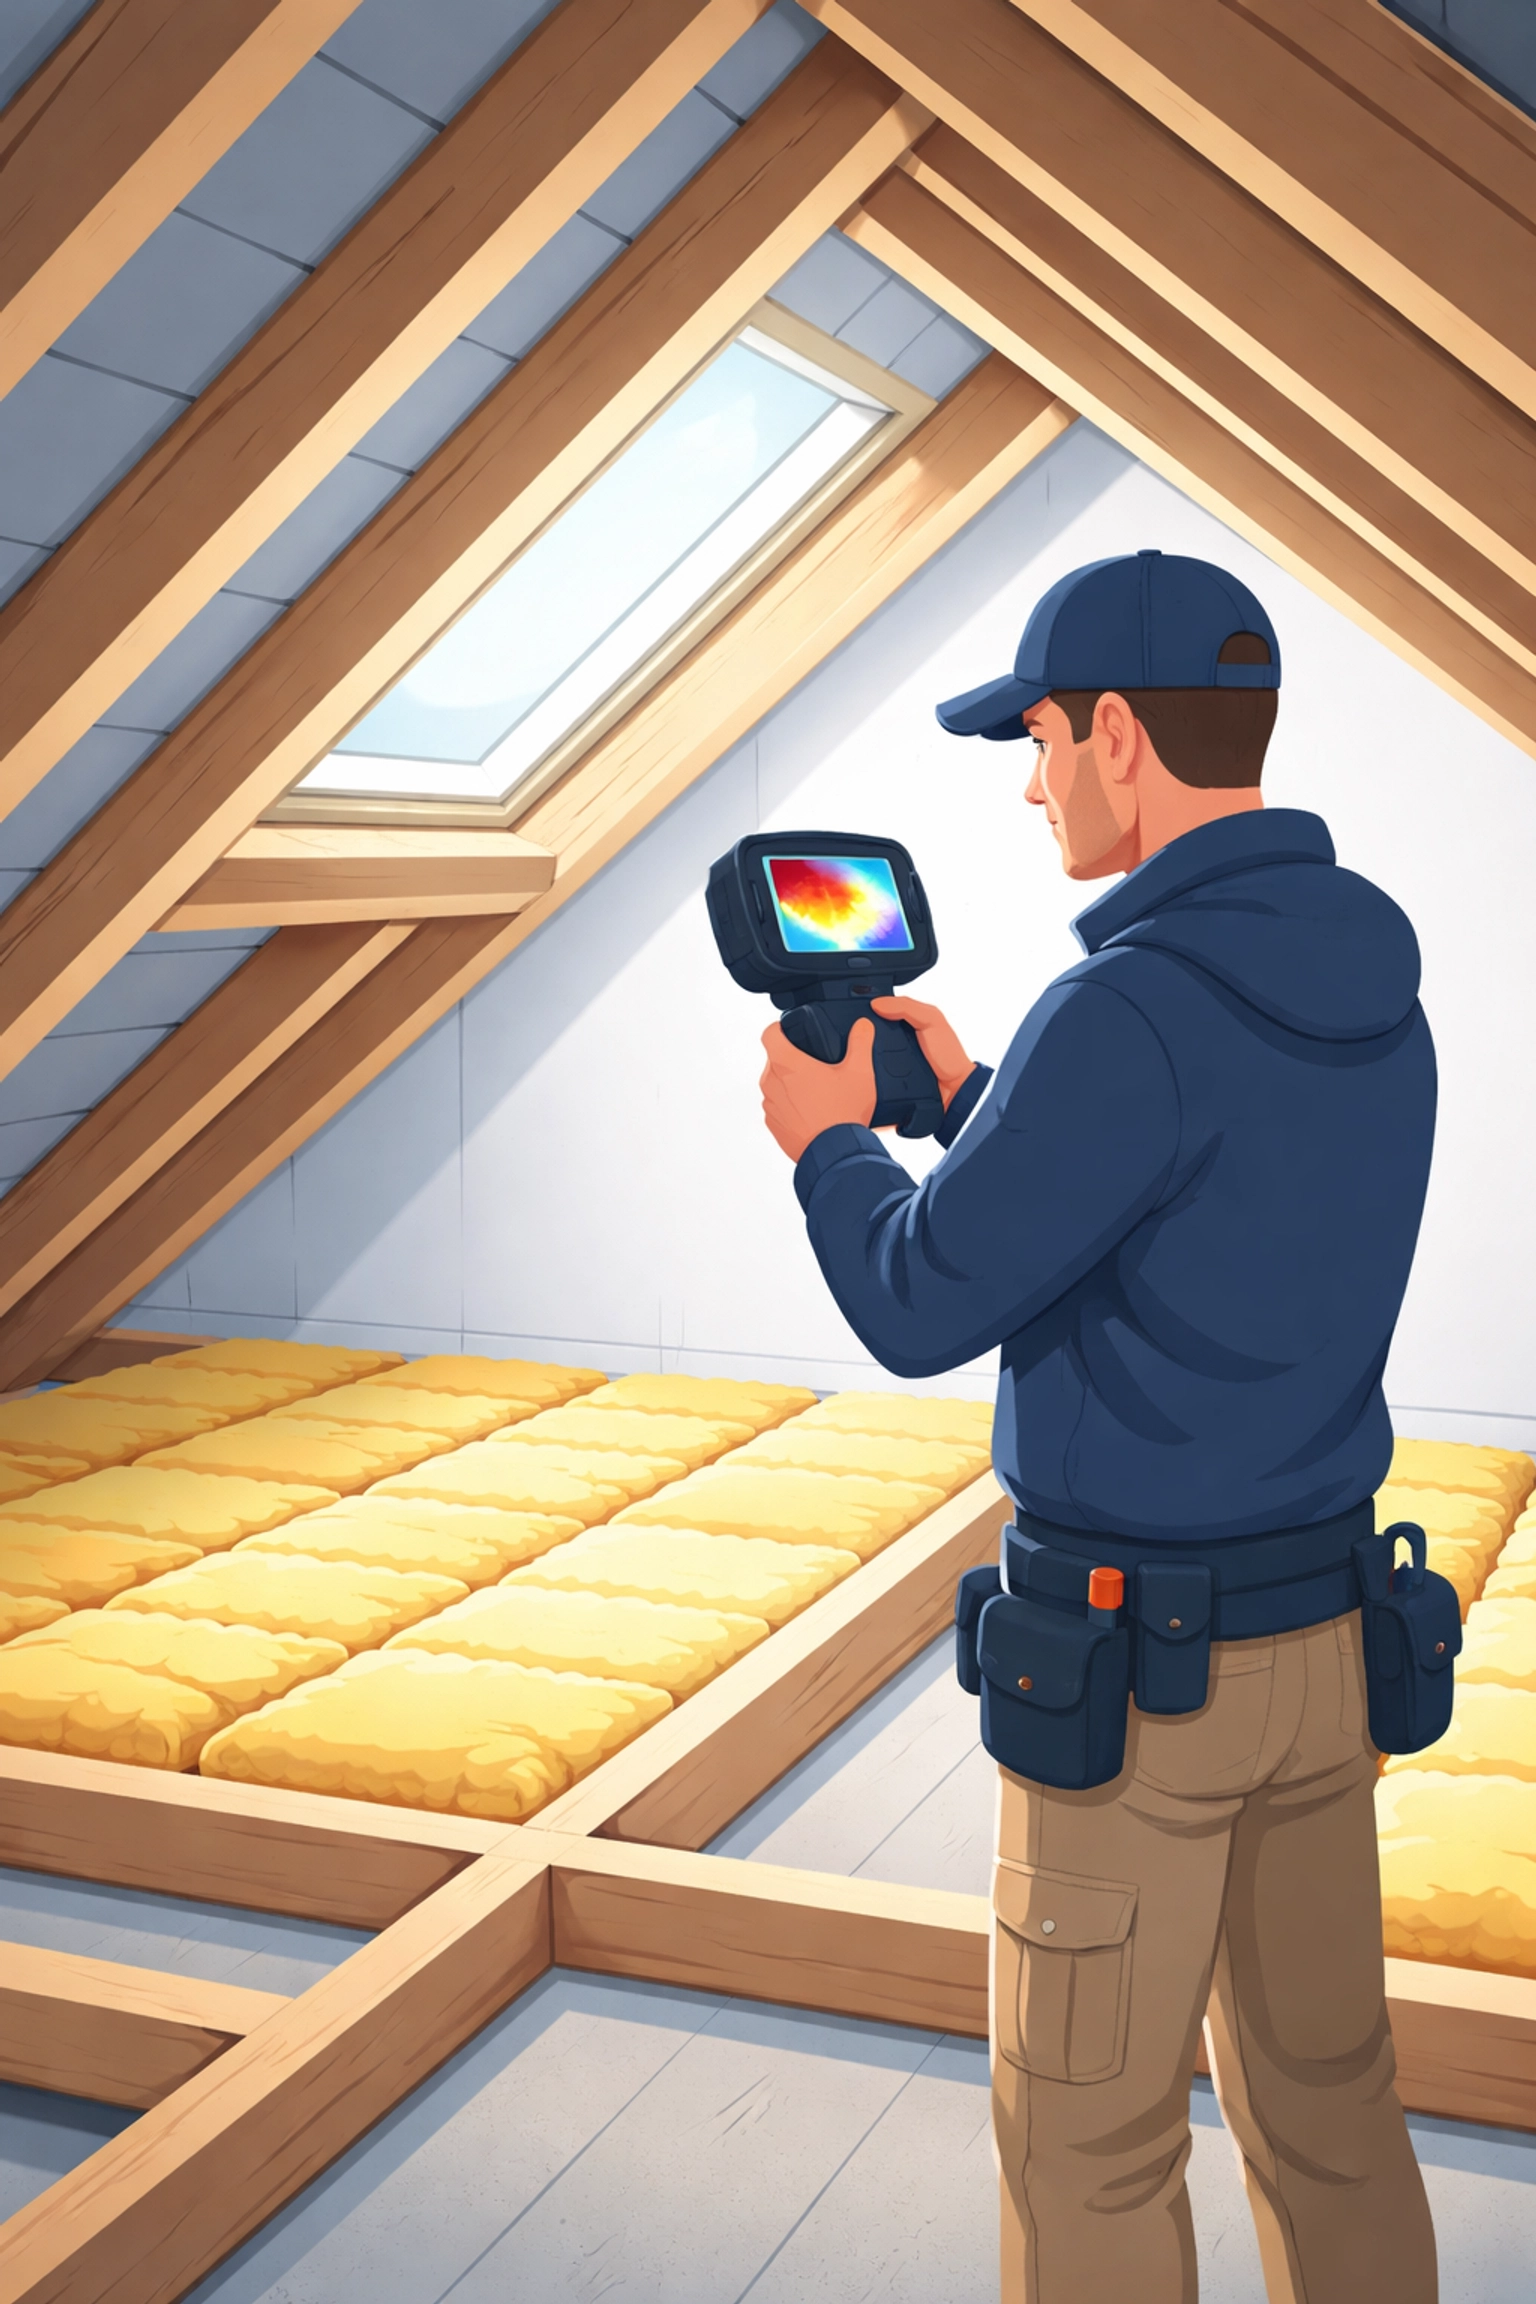
These checks give you a starting point. But a professional thermal survey reveals problems invisible to the naked eye.
Why Professional Installation Matters
Loft insulation for cold lofts isn't complicated. But it does require attention to detail.
Proper installation means:
- Complete, even coverage with no gaps
- Correct depth to meet current standards
- Air sealing before insulation
- Maintained ventilation paths
- Appropriate materials for your specific loft
At ComfySeal, our certified teams deliver exactly that. Every installation comes with our 10-year workmanship guarantee. We're fully insured and work to all current Building Regulations.
Book Your Free Professional Survey
Not sure which of these ten issues affects your home? That's where we come in.
Our free professional loft survey identifies exactly what's causing your cold loft. We assess insulation depth, check for gaps, inspect ventilation, and look for moisture issues.
You get a clear report with honest recommendations. No pressure. No obligation.
Ready to stop heat loss through your roof for good? Get your free quote and let's make your home warmer this winter.
Final Thoughts
A cold loft rarely has a single cause. Usually, it's a combination; thin insulation, air leaks, poor installation, or moisture problems working together.
The good news? Every one of these issues has a straightforward fix. With the right approach, your loft can finally do its job: keeping your home warm and your energy bills low.