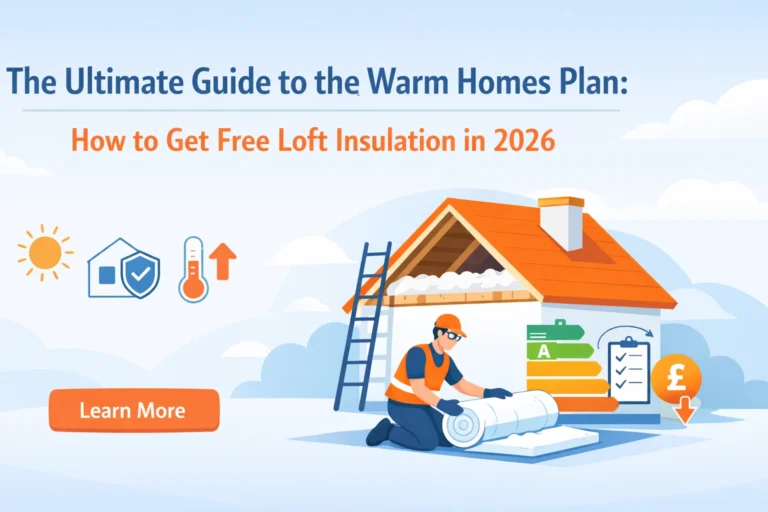
Your loft insulation should be working hard for you. Cutting your heating bills. Keeping your home warm in winter and cool in summer.
But here's the thing. Even well-intentioned insulation jobs can go wrong. Small mistakes lead to big problems. Cold spots. Damp. Wasted energy. Even fire risks.
The good news? Most of these issues are easy to fix once you know what to look for.
Let's walk through the seven most common loft insulation mistakes UK homeowners make. And more importantly, how to put them right.
1. Using Insufficient Thickness
This is the most widespread problem we see. Homeowners install insulation, but not enough of it.
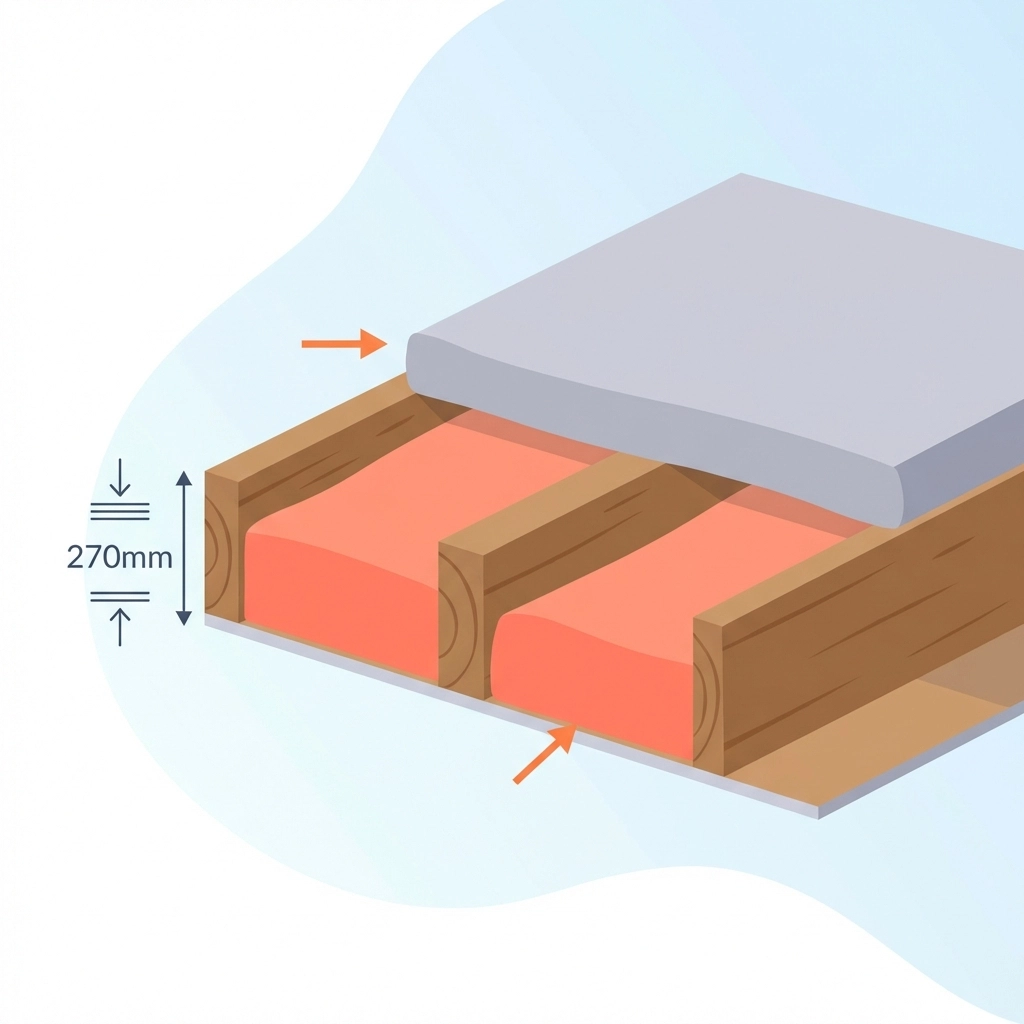
Current UK guidelines recommend 270mm of mineral wool insulation for optimal thermal performance. Many lofts have half that. Or less.
A single thin layer laid between the joists won't cut it. Heat escapes straight through the timber joists themselves. They act as thermal bridges, letting warmth leak out.
How to fix it:
Use the two-layer method. First, fit a 100mm layer snugly between the joists. Then lay a second 170mm layer at right angles over the top.
This cross-layering covers the joists and creates a continuous thermal blanket. It's the approach that meets building regulations and delivers real results.
If your existing insulation is thin, consider a rockwool top-up to bring it up to standard.
2. Compressing the Insulation
Here's a mistake that seems harmless but causes serious damage.
You need storage space. So you lay boards across your loft. Maybe stack some boxes up there. Makes sense, right?
Wrong. Placing boards or heavy items directly on top of insulation crushes the fibres. Those air pockets trapped inside the material? They're what provide the thermal resistance. Squash them flat and you destroy the insulation's effectiveness.
Research from the National Physical Laboratory found compression can reduce performance by up to 50%. Half your insulation value, gone.
How to fix it:
Never place storage boards directly on insulation. Instead, use raised loft legs. These simple stilts lift your boarding above the insulation layer, keeping it fluffy and effective.
You get your storage space. Your insulation stays uncompressed. Everyone wins.
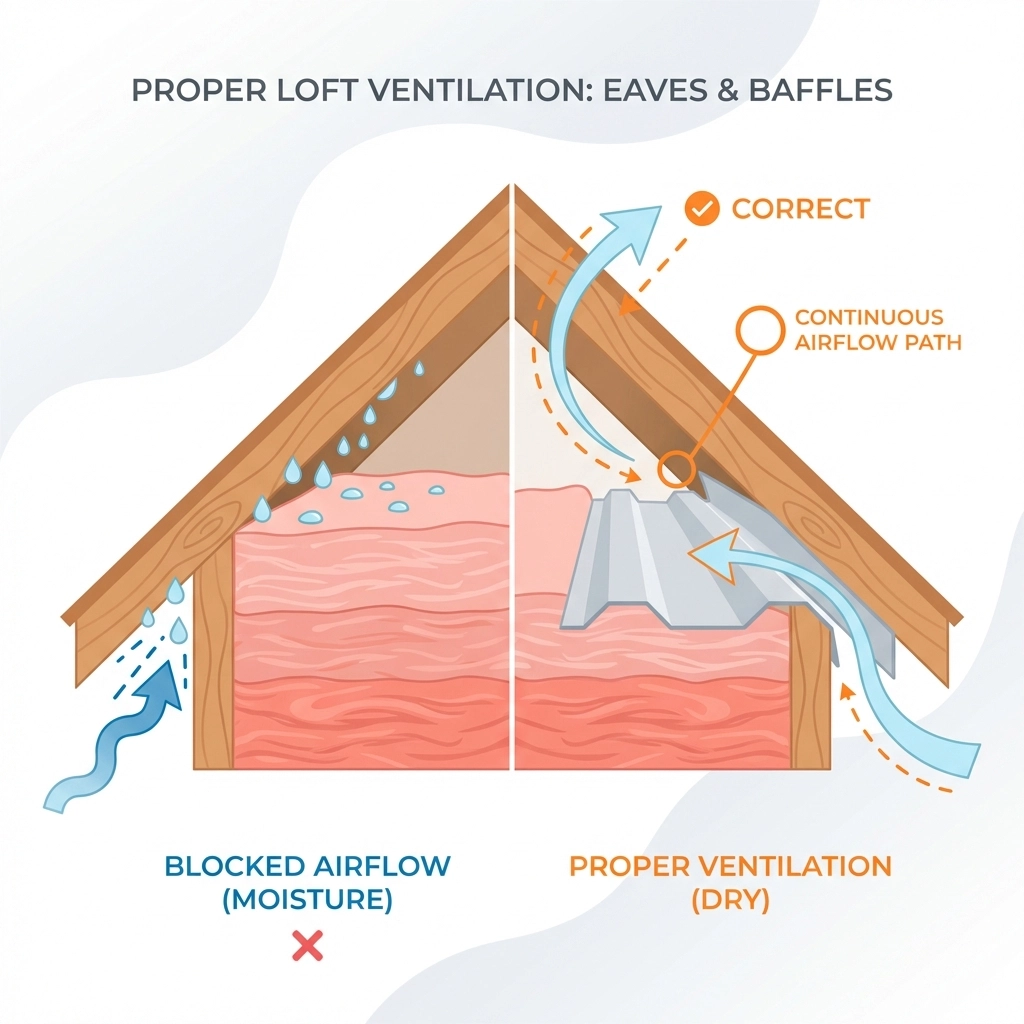
3. Blocking Ventilation at the Eaves
This one causes long-term damage that often goes unnoticed until it's too late.
It's tempting to push insulation right into the corners of your loft. Cover every inch, maximise the warmth. Logical thinking.
But those eaves need to breathe. Warm, moist air rises from your living spaces into the loft. Without proper ventilation, that moisture gets trapped. It condenses on cold surfaces. And you end up with damp, mould, and rotting timbers.
How to fix it:
Install ventilation baffles at the eaves. These simple plastic or cardboard guides create an air gap between the insulation and the roof. Air flows in through the eaves, circulates through the loft, and exits through ridge vents or tile vents.
Keep your loft dry. Keep your roof timbers healthy. Never block those eaves.
4. Burying Electrical Cables
This mistake isn't just inefficient. It's dangerous.
Electrical cables running through your loft need space to breathe. When you bury them under thick layers of insulation, they can't dissipate heat properly. The cables overheat. And overheating cables create fire hazards.
Many DIY insulation jobs make this error. Cables get covered up and forgotten about.
How to fix it:
Before adding or adjusting insulation, locate all electrical cables in your loft. Then lift them so they sit loosely on top of the final insulation layer.
This keeps them accessible for future inspection. More importantly, it lets heat escape safely. Never trap cables underneath insulation.
If you're unsure about your loft's wiring setup, get a professional to take a look before you start.
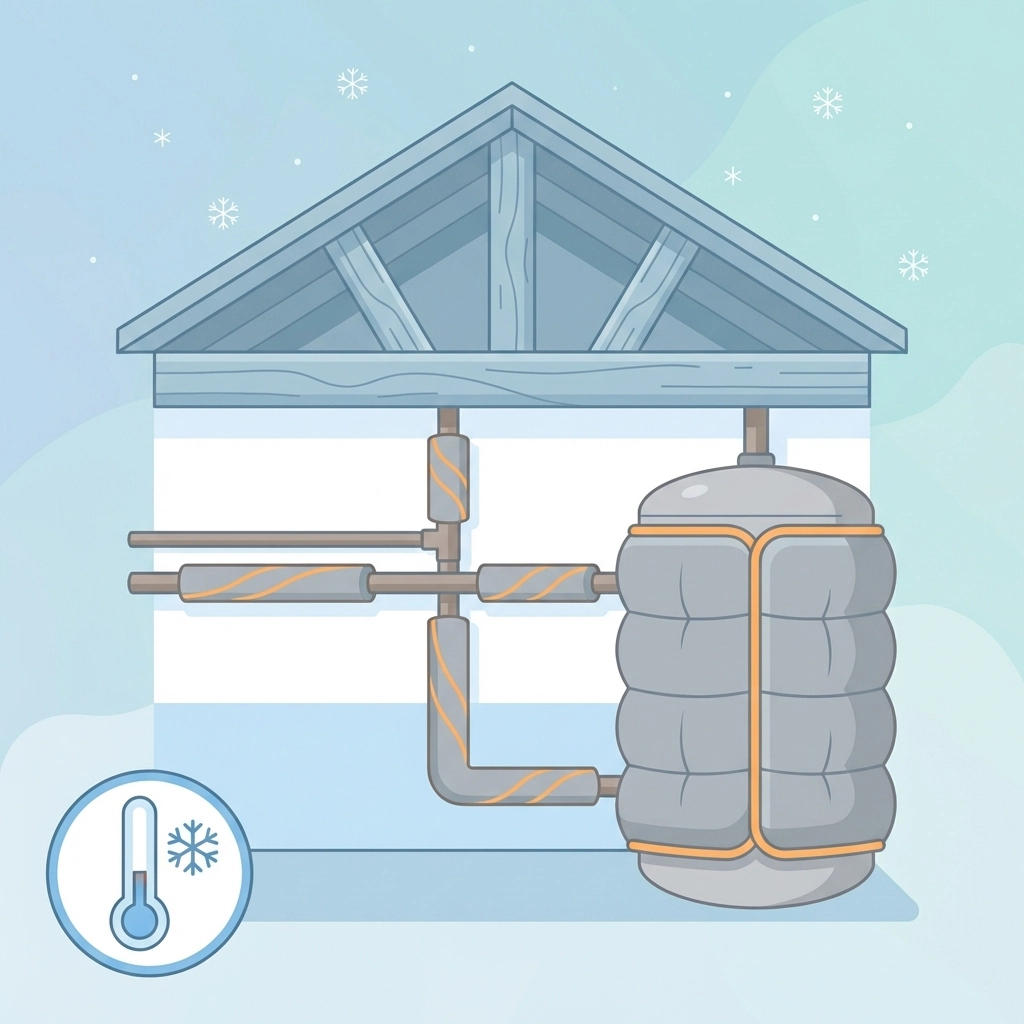
5. Failing to Lag Water Pipes and Tanks
Proper loft insulation does its job well. Perhaps too well.
When you insulate your loft floor effectively, you create a thermal barrier between your warm home and the loft space above. The loft gets much colder as a result. In winter, temperatures up there can drop below freezing.
Any water pipes or tanks in your loft are now exposed to those freezing conditions. Unlagged pipes freeze. Frozen pipes burst. And burst pipes cause floods.
How to fix it:
Lag all water pipes and tanks in your loft. Use foam pipe insulation for pipes. Wrap tanks with insulating jackets. Do this before or during your insulation installation.
One important note: never insulate underneath a water tank. You want some warmth from below to reach it.
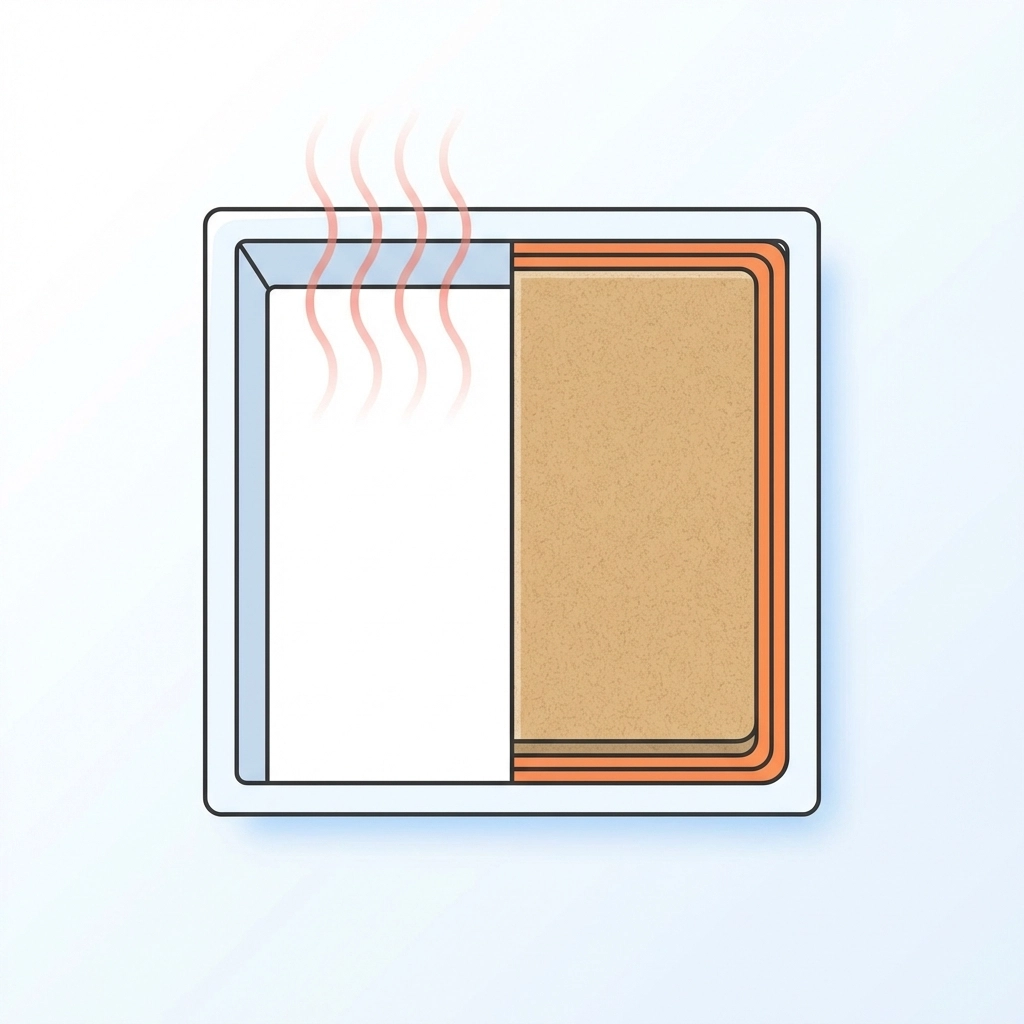
6. Leaving Gaps and Cold Spots
Insulation works as a system. One continuous barrier stopping heat from escaping.
Gaps break that system. Even small ones.
A few inches of exposed ceiling here. An awkward corner left bare there. These voids act as thermal bridges. Heat finds them and escapes through them. Your energy bills stay high despite your insulation investment.
How to fix it:
Check your loft insulation for complete coverage. Look for:
- Gaps around pipes and cables
- Bare patches near hatches or access points
- Awkward corners where rolls don't quite fit
- Areas where insulation has slipped or settled
Fill any gaps you find. Loose-fill insulation works brilliantly for awkward spaces. Cellulose or mineral wool granules pack into corners and irregular areas where rolls can't reach.
Aim for a complete, unbroken blanket across your entire ceiling area.
7. Neglecting the Loft Hatch
Your loft hatch is probably the biggest hole in your thermal barrier. And most people ignore it completely.
An uninsulated, draughty hatch lets warm air pour straight up into your cold loft. You feel the draught in the room below. Your heating works overtime to compensate.
All that careful insulation work, undermined by one overlooked access point.
How to fix it:
Treat your loft hatch as part of the insulation system. Not separate from it.
- Insulate the hatch itself using rigid PIR or phenolic insulation boards glued to the top surface
- Add draught-proofing strips around the frame to create an airtight seal when closed
- Consider a hinged or counterbalanced hatch that closes properly every time
A well-insulated, draught-proofed hatch makes a noticeable difference to comfort levels in the rooms directly below.
Getting Your Loft Insulation Right
These seven mistakes are common. But they're all fixable.
The key is understanding that loft insulation works as a complete system. Thickness matters. Ventilation matters. Every gap and weak point matters.
Get it right and you'll notice the difference. Warmer rooms. Lower bills. A home that holds onto heat instead of losing it through the roof.
Not sure where to start? Consider which insulation type suits your situation. Traditional mineral wool works well for most lofts. But if you're short on headroom, multifoil insulation offers excellent performance in a thinner profile.
Final Thoughts
Most loft insulation problems come down to shortcuts and oversights. Using too little material. Blocking ventilation. Forgetting about hatches and pipes.
The fixes are straightforward. Check your current setup against this list. Address any issues you find. And if you're planning new insulation work, avoid these mistakes from the start.
Your loft should be one of the easiest places to improve your home's energy efficiency. Do it properly and the benefits last for decades.
Ready to upgrade your loft insulation the right way? Get a quote from our team and we'll help you get it sorted.